Getting your seeds sprouted and into seedlings to plant directly into your garden is a great way to to get a head start on the growing season, particularly if you live in an area where the growing season is short or your ground just isn’t going to be ready for your first planting. Regardless if you wish to plant your seeds directly into starting pots, or are sprouting them using the paper towel method, you’ll need to have a place to grow your plant until it’s ready to go into the garden.
Using fancy growing pots or leftover plastic containers (like the ones you get from pudding or yogurt cups) works really well, but they do have 1 major drawback:
How do you get the seedling out?
When removing your plant from a plastic container, you must be very careful to slide the plant out without damaging the root system that has begun to take place. It’s also quite difficult to keep the dirt around the roots intact once you start pulling it out of the container. Then you have a trail of plastic cups you have to pick up once you’ve finished planting.
Why not use a biodegradable pot?
With standard items around the house, you can make great seed starting pots that you can generally plant directly into the ground without harming the plant or the environment.
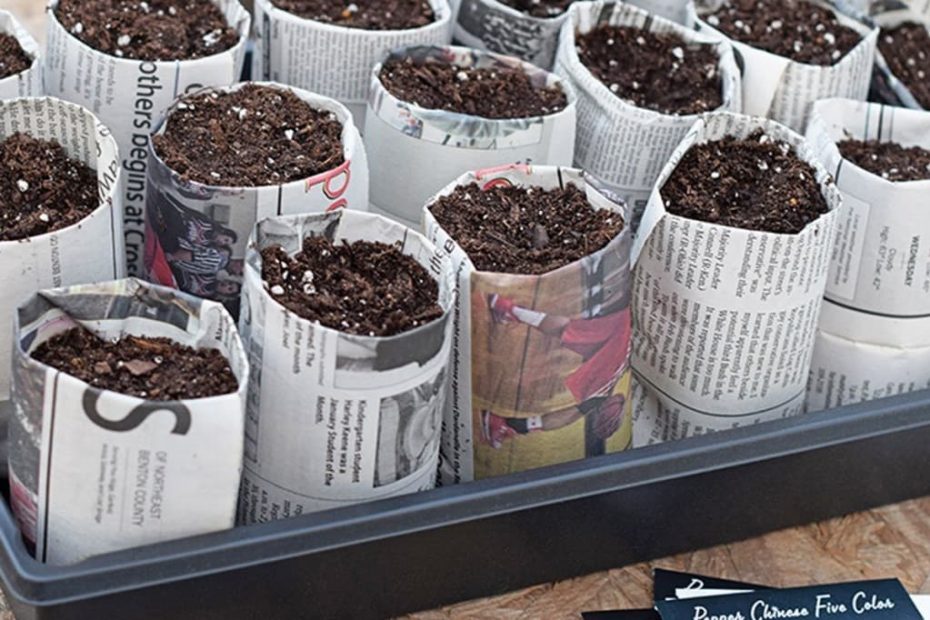
Newspaper pots
Newspaper pots are slightly more difficult and time consuming to make, but are the most biodegradable of the solutions and are the easiest for the roots to penetrate to get to your garden soil.
To make a newspaper pot, cut or fold your newspaper so that you have a rectangular piece of paper 2 pages thick, 6-8″ tall, and about 12″ in length. Use a glass or other cylindrical object (straight edges, not tapered) that is about 3″ wide to be the “mold” for your pot.
Lay out the paper lengthwise and place your glass about starting halfway down the paper. That means 3-4″ of paper should be above the top of the glass, and will be used to fold down into a base for your pot.
- Acacia Flower
- Aesthetic Plant Pictures
- Air Plant Ideas
- Aloe Vera Plant Images
- Alstroemeria Flowers
- American Beautyberry
Roll the paper around the cup 2-3 times. You will probably not need to seal the edge after the base is in place.
Take the excess paper above the top of the glass and fold the paper down and into the glass as if wrapping the glass as a Christmas present or for moving.
Slowly slide the glass out of your new pot. Once the glass is removed, push down the inner “base” you created on the previous step so you have a solid base that will allow your new pot to sit upright as flat as possible. Don’t worry if it doesn’t sit perfect. You’ll likely be putting a number of these pots inside a larger container and can use additional paper pots to help balance them all upright.